
Macsusc
-
Posts
340 -
Joined
-
Last visited
-
Days Won
22
Content Type
Profiles
Forums
Downloads
Events
Store
Gallery
Blogs
Articles
Videos
Recipes
Raffles
Everything posted by Macsusc
-
6
-
test45
-
test3
-
test3
-
test2
-
I can see there is a problem here with the space in the username Nova Solis, we are working on a bug fix for this so you two can party up properly!
-
Congratulations Zauwron with 102 LP! LP will now be halved for the win so everyone else moves up in opportunity! He won the Steam Deck! If you missed it live on our carnival where we gave away several other things to winners of the mini games, check out the timestamp below!
-

PC Giveaway Weekly Winner - RedRuby - Congratulations!
Macsusc posted a blog entry in PC Giveaway Community's News & Updates
RedRuby is getting the Steam Deck in our first Weekly spin! Thank you everyone who did come and tune into our Carnival where players in our mini games also won 3x $20 steam gift cards and 3x $20 PayPal amongst other things. Hope to see you in the next one. RedRuby has been a member from very early days, he won a Black Box Computer 2 years ago!!! I flew to his country and met him personally for the first time, he let me stay at his place and I met his family, he's an amazing person and deserves this win. He had a whopping 818 Lucky Points!! Not only was he a member for years, he also decided to Go Eternal recently. The winners Lucky Points will be cut in half to let other people have a fairer shot as per our rules 🙂 Next one is NEXT WEEKEND! If you missed the selection, check out -
This member has 98 Lucky Points which will now be halved so everyone else gets a shot! Our automatic delivery system will now email you every 2 days and you've just got to enter your delivery details and our team will be in contact to understand what your dream PC build is so we can build it for you, or you can of course take the cash, up to you! Thank you to everyone who joined us on this amazing stream where we also gave away a keyboard for our reddit! Congratulations to everyone who won in the mini games as we gave away over $100 usd through the Carnival on top of everything! We will now move to doing our giveaways ever weekend instead of every month. Thank you for being apart of our community, see you next time 🙂
-
Win some ctokens baby
-
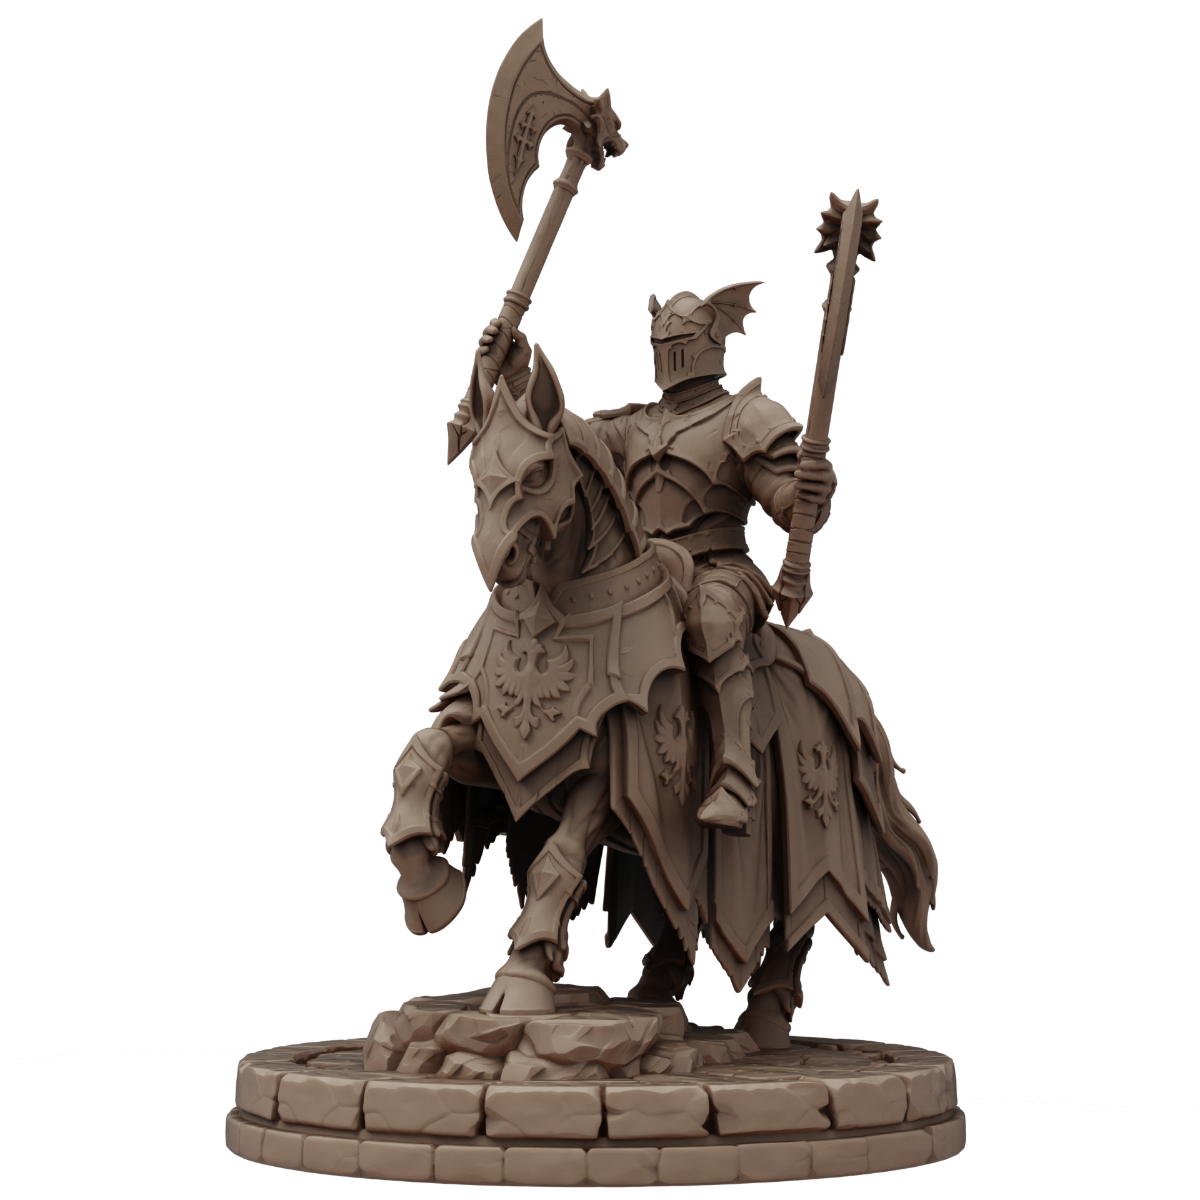
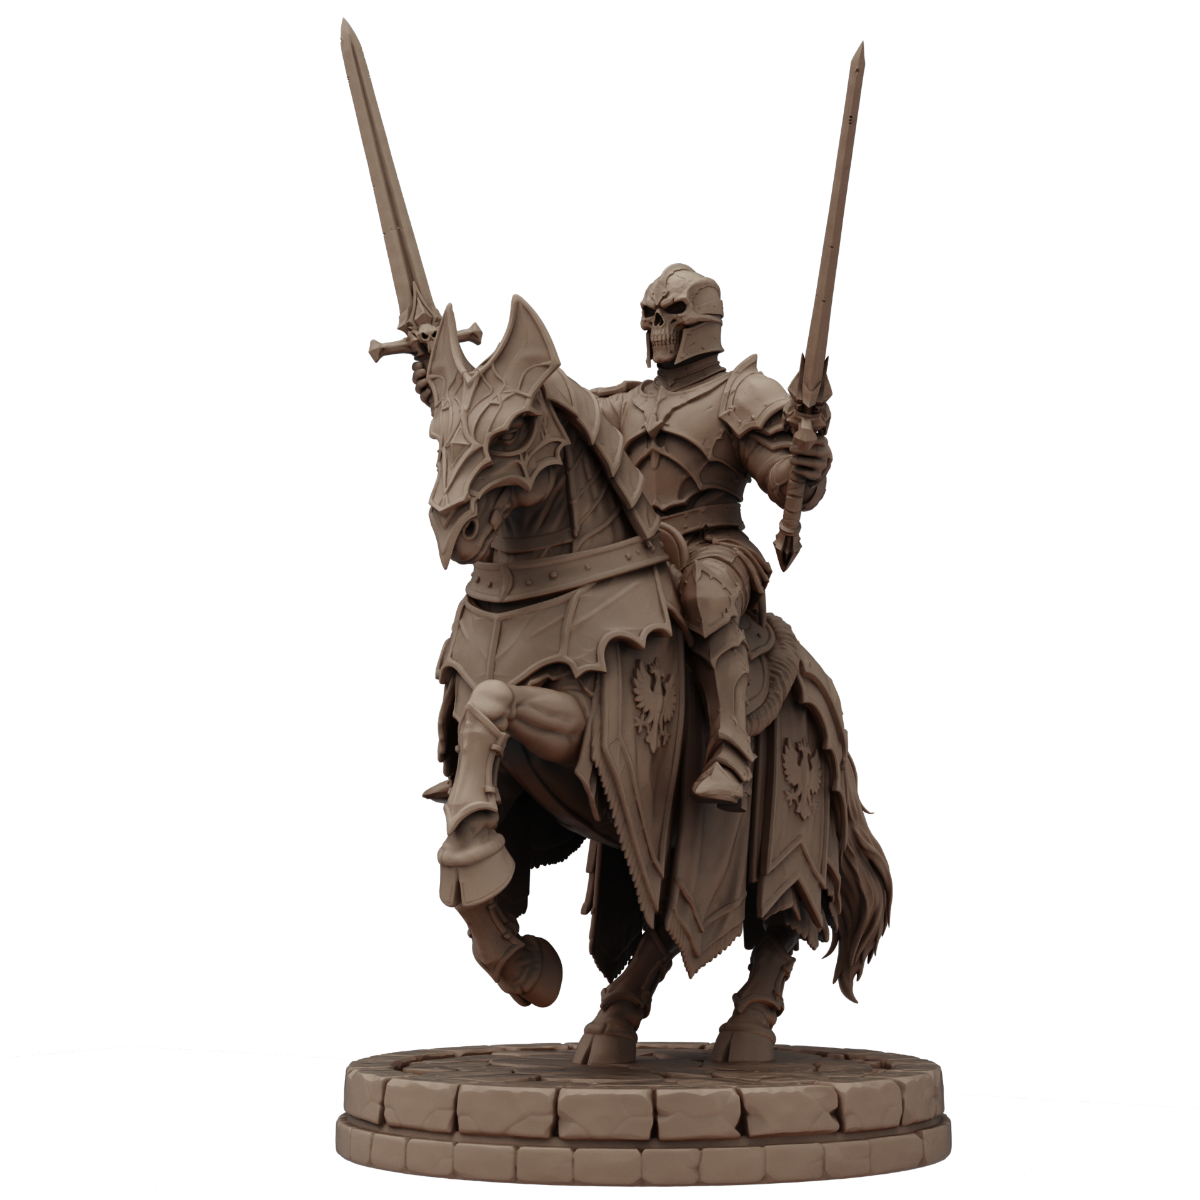
Sneak peak of new Soulblight Gravelord Blood Knights!
Macsusc posted a topic in Miniatures's General
knight6.mp4
-
Hey @og_freaksghost and @Titusjourney - I have not forgetten about you guys! We are just trying to work out the best way to print them and ship them to you! - I will PM you guys for delivery details.
-
WoWScrnShot_062826_002626.jpg
Macsusc commented on mashiro37's gallery image in World of Warcraft's Transmog Giveaway
 NICE!
NICE! -
Copilot_20260620_234208.png
Macsusc commented on gandelin's gallery image in World of Warcraft's Transmog Giveaway
 Okay that's gona be hard to beat
 -
Gift Code Drops Have Arrived Corpse Scanner is expanding beyond item drops, Rubies, Forum Gold v2, and Lucky Points with an entirely new reward category: Gift Code Drops. Available through Play With Purpose, the gaming rewards overlay powered by The Crimson Market, Gift Code Drops allow eligible corpse scans to unlock real gaming rewards in addition to traditional loot and currencies. Players can now discover rewards such as: Steam Gift Cards Battle.net Balance PlayStation Gift Cards Xbox Gift Cards Nintendo Gift Cards Digital Game Keys Gaming Store Credit Other gaming products available through Giftforge This creates a stronger play-to-earn experience where gameplay activity can lead directly to rewards that gamers can actually use. What Is Play With Purpose? Play With Purpose is a gaming rewards overlay that allows players to earn rewards while playing supported games. Available through Overwolf, Play With Purpose adds reward systems directly into gameplay, creating opportunities to earn loot, currencies, points, and other rewards simply by playing. Corpse Scanner is one of the reward systems available within the Play With Purpose ecosystem. Install Play With Purpose: https://www.overwolf.com/app/play-with-purpose Learn more about Play With Purpose: https://www.thecrimsonmarket.com/playwithpurpose Whether you're hunting corpses for loot, earning Lucky Points, collecting Rubies, or discovering Gift Code Drops, Play With Purpose is designed to make every gaming session more rewarding. How Gift Code Drops Work Gift Code Drops are fully integrated into the existing Corpse Scanner reward system. When a corpse is scanned, the scanner continues to roll for traditional rewards such as: Item Drops Rubies Forum Gold v2 Lucky Points When Gift Code Drops are enabled, certain eligible reward rolls can instead become a digital reward discovery. Personalize Your Rewards Players can customize their reward preferences by selecting: Preferred gaming platforms Gift card rewards Full game rewards Game genres Supported gaming storefronts Product categories Supported platforms may include: Steam Battle.net PlayStation Xbox Nintendo Epic Games Riot Games Ubisoft When a Gift Code Drop occurs, the system automatically selects an available reward that closely matches both the reward value and the player's configured preferences. The gift code is then delivered directly to the player's email and can also be viewed from their inventory. Why Gift Code Drops Matter Most gaming reward systems stop at points or internal currencies. Gift Code Drops extend rewards beyond the platform by allowing gameplay activity to potentially generate rewards that can be used throughout the wider gaming ecosystem. Instead of only earning in-platform rewards, players now have opportunities to discover rewards that can be redeemed across major gaming platforms. A single corpse scan could potentially result in: Steam Wallet Credit Battle.net Balance A PlayStation Gift Card An Xbox Gift Card A Nintendo Gift Card A New Game DLC Content Digital Store Credit This creates a more meaningful reward loop where gameplay can lead directly to products and services gamers already use. Built for Reward Hunters Gift Code Drops are designed for gamers who enjoy: Play-to-Earn Gaming Gaming Bounties Loot Hunting Reward Drops Digital Gift Cards Steam Rewards Battle.net Rewards Console Rewards Game Key Giveaways Cross-Game Progression Every corpse scan becomes another opportunity to uncover something valuable. From Corpse Scanning to Gaming Bounties Gift Code Drops help transform Corpse Scanner into a broader gaming bounty system within Play With Purpose. Every scan becomes part of a reward hunt where players are not only searching for loot within a game, but also opportunities to discover real gaming rewards. The Reward Loop Play a supported game. Discover and scan corpses using cTokens. Roll for loot, currencies, points, or Gift Code Drops. Receive eligible rewards by email. Track rewards from inventory. Continue playing and earning through Play With Purpose. This creates a satisfying progression loop that rewards activity, exploration, and consistency. Configure Rewards Around Your Interests Different gamers want different rewards. Gift Code Drops allow each player to customize their reward pool based on their interests. PC Gamers Focus on: Steam Battle.net Epic Games Riot Games Ubisoft PC Game Keys Console Gamers Focus on: PlayStation Xbox Nintendo Gift Card Collectors Prioritize gift cards while excluding game rewards. Game Collectors Select preferred genres and allow the system to prioritize matching games whenever available. This flexibility makes Gift Code Drops suitable for: MMO Players ARPG Players FPS Players Survival Gamers Strategy Players Console Gamers Reward Hunters A Better Loot Experience The goal of Play With Purpose is simple: make gaming more rewarding. Item drops remain an important part of Corpse Scanner. Rubies remain important. Forum Gold v2 remains important. Lucky Points remain important. Gift Code Drops simply introduce another exciting possibility. An eligible corpse scan could now result in: A valuable item Platform currency Lucky Points Rubies Steam Wallet Credit Battle.net Balance A New Game DLC Content Gaming Store Credit Every scan becomes another chance to discover something useful. Get Started With Play With Purpose Gift Code Drops are available through the Play With Purpose ecosystem and can be discovered through eligible Corpse Scanner reward rolls. If you want to turn your gameplay into opportunities for rewards, install Play With Purpose and start scanning today. Install Play With Purpose https://www.overwolf.com/app/play-with-purpose Learn More https://www.thecrimsonmarket.com/playwithpurpose Summary Gift Code Drops add a powerful new reward layer to Corpse Scanner and the broader Play With Purpose ecosystem. Players can customize reward preferences, discover eligible digital rewards through gameplay, receive gift codes by email, and track rewards directly from inventory. For gamers looking for Steam gift cards, Battle.net balance, PlayStation rewards, Nintendo gift cards, Xbox rewards, digital game keys, gaming bounties, and play-to-earn opportunities, Play With Purpose now delivers an even more rewarding way to play.
-
The Overlooked Strength: Tesla's Battery and Energy Business
Macsusc posted a blog entry in Electric Cars's Articles
Tesla's Biggest Opportunity Might Not Be Cars When most people think about Tesla, they think about electric vehicles, Elon Musk, Full Self-Driving, or the latest controversy dominating social media. What many people don't realize is that Tesla's fastest-growing business may no longer be automotive at all. It is energy. This creates one of the most fascinating debates surrounding Tesla today. Critics often focus on vehicle delivery numbers, increased competition from Chinese manufacturers, and concerns about future EV demand. Supporters argue that these discussions miss what could become Tesla's most valuable business segment over the next decade. While headlines focus on cars, Tesla has quietly been building one of the largest battery storage businesses in the world. Why Energy Storage Matters Renewable energy has a fundamental problem. Solar panels only generate electricity when the sun shines. Wind turbines only generate electricity when the wind blows. Yet homes, businesses, and entire cities require power 24 hours a day. The missing piece has always been storage. Large-scale battery systems allow excess energy generated during peak production periods to be stored and released when demand increases. This helps stabilize power grids, reduce reliance on fossil fuel peaker plants, and make renewable energy far more practical at scale. Tesla's Megapack was built specifically to solve this problem. Unlike Powerwall units designed for homes, Megapacks are industrial-scale battery systems capable of supporting entire communities, utility networks, and energy providers. A Business Growing Faster Than Many Realize Tesla's energy division has expanded rapidly over the last several years. Each new Megafactory increases production capacity for battery storage products, allowing Tesla to deploy larger projects across multiple continents. For investors and industry observers, this is significant because energy storage is often viewed as a much larger long-term market than electric vehicles. Every country is attempting to modernize its power grid. Every country is investing in renewable energy. Every country faces the same challenge: How do you store electricity when generation exceeds demand? Tesla's answer is batteries. And demand appears to be growing faster than supply. The Australian Example Australia provides a glimpse into why Tesla Energy could become such an important business. The country has some of the world's highest rates of rooftop solar adoption and continues investing heavily in grid-scale battery infrastructure. As renewable energy penetration increases, the need for large-scale storage becomes even more important. In a surprising development, Tesla's Australian energy operations have reportedly generated more revenue than its automotive business in the region. Think about that for a moment. A company globally known for cars generated more revenue from batteries and energy infrastructure than from selling vehicles. That statistic alone highlights how dramatically Tesla's business model may be evolving. Higher Margins, Lower Competition One reason Tesla's energy business attracts so much attention is profitability. The automotive industry has historically been one of the most competitive industries in the world. Manufacturers compete on pricing, financing, incentives, and production volume. Energy storage is different. Building grid-scale battery infrastructure requires enormous engineering expertise, manufacturing capacity, software integration, and supply chain management. The number of companies capable of delivering these projects at Tesla's scale is relatively small. As a result, energy storage can potentially generate stronger margins than vehicle manufacturing while facing less direct competition. This is one of the primary reasons many bullish analysts view Tesla Energy as one of the company's most valuable long-term assets. The Controversial Bull Case This is where the debate becomes particularly interesting. Many Tesla critics continue to value the company primarily as a car manufacturer. Many Tesla supporters increasingly view Tesla as something entirely different: An AI company A robotics company An autonomous transportation company An energy infrastructure company If the energy business continues growing at its current pace, Tesla's future valuation could become increasingly disconnected from vehicle sales alone. The controversial argument is simple: Tesla may eventually become more important to the world's electrical infrastructure than it is to the automotive industry. For a company that started by selling electric sports cars, that is a remarkable possibility. And if that transformation succeeds, history may look back on Tesla's battery business, not its vehicles, as the company's most important contribution to the world. -
OSTBrav0 had 84 LP! - The LP will now be halved for this member. Check our the recap here : Thank you so much for being a member and supporting us! You won the COOKED PC! The delivery management system will reach out every 2 days to facilitate the delivery through DHL! OSTbrav0 Congratulations! Guys please congratulation our winning member of the community ❤️
-
-
I will PM you soon to organise it!
-
Transmog Competition #2 (Pirates)
Macsusc commented on Kittrix's event in World of Warcraft's Calendar
You should evolve into a transmoger! -
you're in
-
/invite Korrupture
-
For those that were in the Crimson Loot Carnival today at https://twitch.tv/crimsonlootcarnival - thank you for piloting our new wager & betting system. This system allows for a few things, you can create a direct 1v1 bet with one other person for things like duels. And you can create a pool with as many different out comes as you want, the winners get the whole pool split for them based on their relative size of bet. We can use Forum Gold v2 and other currencies like Charades Coin in this system. After the event is over, there is a proposed winner and link for proof added, then an admin needs to go and confirm it, if you set admin confirmation (this depends on whether the participants trust the creator or the creator & participants want to put the trust on TCM as an escrow for additional security. Here from the admin view they are able to confirm the payout or cancel and refund everyone. In this case it got confirmed & resolved, the winners got all of their forum gold earnings! Well done! If you go to https://www.thecrimsonmarket.com/forumgold you will see that we are betting with an ingame digital currency which cannot be bought or sold as we are just doing this for fun! Cheers.
-
Thank you! would you like me to send one to you for free? These are the files where you can see them more / up close / spin around, I can send the resin printed models to you ready for gluing and painting. https://www.thecrimsonmarket.com/hub/files/category/16-proxies-3d-models-downloads/
-
Thank you! would you like what sent to you?