Overview
About This Club
To enter the giveaway, grab a Golden Ticket here https://www.thecrimsonmarket.com/join : All about computers, showcase your builds, battle stations, get tips, tricks and more.
- What's new in this club
-
 vKarmah joined the club
 -
 miri_lie joined the club
 -
 Pandaburger joined the club
 -
 samuel_sanders_sam joined the club
 -
 SomnnisS joined the club
 -
 axelaugust joined the club
 -
 vincent20004 joined the club
 -
 Dloxbang#1154 joined the club
 -
 Chamler joined the club
 -
 yaseen_davids joined the club
 -
.thumb.png.0869e15de5ec5d4fbd7cbef715ab6b92.png)
Some doubts about the wallet
Cat_Dad8311 replied to mikahelll1's topic in PC Giveaway Community's General
Thx for the updates good Sir! -
 eeftool joined the club
 -
 KandicTV#2912 joined the club
 -
 BobaT joined the club
 -
 onlyME joined the club
 -
 Lahmacunity joined the club
 -

.thumb.png.7bf96af116aabb6d86fe73469d6211ea.png)
Version 0.1.0
2 downloads
Try it while it's free! Join https://www.thecrimsonmarket.com/hub/clubs/2-pc-giveaway-community/ to be permitted to download this file. This is an early version of the Interactive Machine Intelligence Node I have been working on. You can control your entire computer with simple voice commands & hand gestures. "Open outlook and send an email to Greg saying hello I am sending this through IMIN" It will plan how to open outlook, whether it's through the desktop app, a browser like google chrome or otherwise, then it will find Greg as a recipient, click on him and input the text before sending. Everything is handled like a real human being would, it moves the cursor and presses buttons, therefore it works out of the box and you don't run into a million errors like other concepts on the market. Full gesture control as well, with reversal for AR glasses where the camera looks at the back of your hands. This is the first time I'm ever uploading it so I am calling this version 0.1.0 - It's early in development but it does work and I have completed a lot of work while away from my work station by remoting in and controling my entire computer with this system.Free -
 midnitep joined the club
 -
Some doubts about the wallet
Macsusc replied to mikahelll1's topic in PC Giveaway Community's General
Hey! Wallet for now is strictly for cashing out -
Yeah, the Lian Li O11 Vision Compact ATX Mid-Tower Case is actually a really good choice for your build.
-

Some doubts about the wallet
mikahelll1 replied to mikahelll1's topic in PC Giveaway Community's General
And with this, im also on level 1. YAY AHAHAHAHA. -
Hey guys, not sure if this is the best place to ask, but I wanted to clear something up. Is the wallet used strictly and exclusively for redemptions/cashouts? For example, is it possible to use the funds currently in my wallet to buy something on Giftforge, or to purchase cTokens directly? Thanks in advance!
-
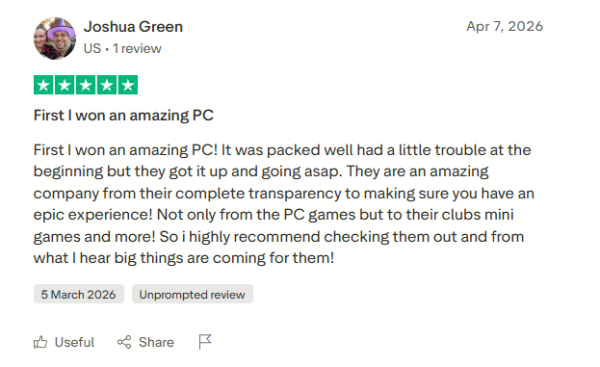
Reddit_Mika.png
mikahelll1 commented on Macsusc's gallery image in PC Giveaway Community's Testimonials
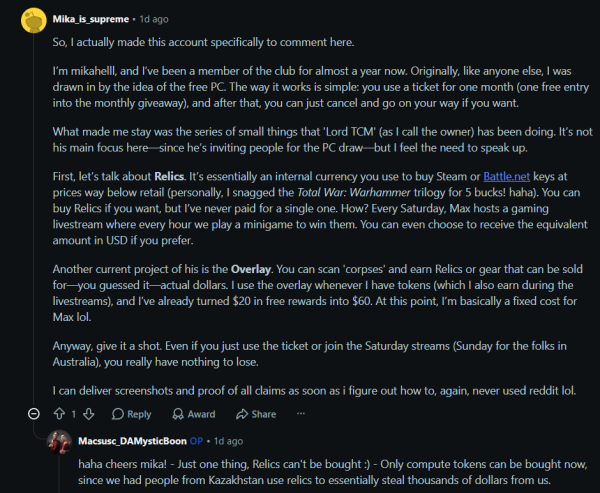 i wonder who that cool fella is
 -
 GameTipsy joined the club
 -
 Is the Lian Li O11 Vision Compact midi tower behuizing suitable?
 -
Yeah those parts all match together well, that’s a really solid high-end build. The only thing I’d double check is GPU and radiator clearance in the case since the RTX 5080 Astral is huge, but otherwise you should be good. congrats on a new PC!
-
Hello, I'm building my first pc and I was choosing which species match and work together. I already have chosen but i don't know if they work good together. CORSAIR VENGEANCE RGB DDR5 RAM 32GB (2x16GB) Up to 6000MHz ASUS ROG Loki SFX-L 850W Platinum White Edition Samsung 9100 PRO 2TB ARCTIC P12 Pro A-RGB ASUS ROG RYUO IV 360 ARGB White - All-in-One CPU Liquid Cooler ASUS ROG Strix X870E-A Gaming WIFI7 Neo ASUS ROG Astral GeForce RTX 5080 16GB GDDR7 White AMD RYZEN 7 9850X3D H1 ATX PC Case Those are the species that I've picked but I don't know if they all match together.
-
ThatPERSON joined the club
-
 hossain_rodiny joined the club
 -
 abhi_samala joined the club
 -
 Titusjourney joined the club
 -

-
-

-

-
-
-

-
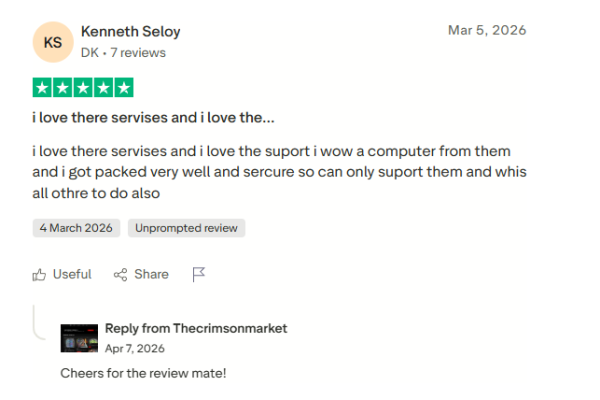
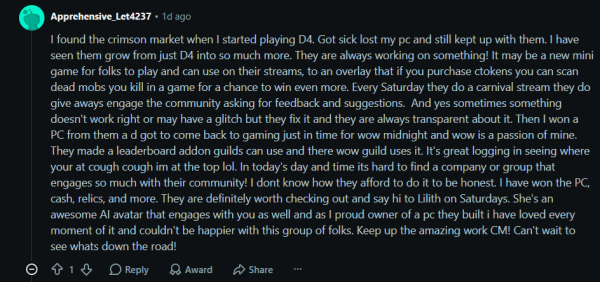
Reddit_Apprehensive_Let4237.png
Macsusc posted a gallery image in PC Giveaway Community's Testimonials
-

-

-
 AltarDaddy joined the club
 -
 Achi098 joined the club
 -
 matthew_stancati joined the club
 -
It is my pleasure really.
-
 RaynnMJ joined the club
 -
Dude thank you so much for this! It feels great to see someone enjoying it, I have a lot of fun developing this particular software, if anyone has any ideas and enhancements, let me know!